• Pencil Drawings
    • Ink Illustrations
    • Life Drawing
    • Oil Paintings
    • Watercolour & Gouache
    • Murals
    • Digital Art & Illustration Portfolio
    • Digital Painting Studies
    • Visual Development
    • Matte Painting
  • Luxury Oil Painting Commissions
  • Blog
    • Plein Air Paintings
    • Drawings & Paintings
    • Portrait & Figure Paintings
    • Realistic Portraits
    • Art Book
    • Fine Art Prints
    • Digital Art Prints
    • Reference Packs
    • Still Life Paintings
  • About
    • Contact Page
    • Subscribe
    • CV
Menu

robbieallenartist

Concept Art - Fine Art - Illustration
  • Drawings
    • Pencil Drawings
    • Ink Illustrations
    • Life Drawing
  • Paintings
    • Oil Paintings
    • Watercolour & Gouache
    • Murals
  • Digital Art & Illustration
    • Digital Art & Illustration Portfolio
    • Digital Painting Studies
    • Visual Development
    • Matte Painting
  • Luxury Oil Painting Commissions
  • Blog
  • Shop
    • Plein Air Paintings
    • Drawings & Paintings
    • Portrait & Figure Paintings
    • Realistic Portraits
    • Art Book
    • Fine Art Prints
    • Digital Art Prints
    • Reference Packs
    • Still Life Paintings
  • About
  • Contact
    • Contact Page
    • Subscribe
    • CV
×

Blog of A World Travelling Artist - Education, Inspiration, Encouragment

How-To-Paint-A-Celtic-Female-Portrait-In-Photoshop-&-Procreate-11-robbieallenartist.jpg

How To Paint a Celtic Female Portrait - In Photoshop & Procreate

Robbie Allen April 17, 2021

This is my latest digital painting tutorial where I break down the steps for my latest portrait painting. The same process can be applied in both Adobe Photoshop and Procreate. I hope you enjoy the post and find some value in it!

Step 1. The Initial Sketch

Step-1---The-Initial-Sketch---Version-4-robbieallenartist.jpg

Start off by setting up the canvas to match the dimensions of the original photo reference, or to your own Liking, You can then ‘tone’ the canvas with a warm or cool colour for the background and fill using the paint bucket tool. This removes the glare of the white canvas and encourages you to get started. Then sketch the outline of the woman's head, facial features and hair on a separate layer. You can use a pencil brush, which closely resembles a 2b traditional pencil to give a more traditional feel, or a simple hard round brush. Take your time to get the proportions right, and enjoy the process!

The original photo reference I used for the portrait. Source: Pinterest, photographer unknown.

The original photo reference I used for the portrait. Source: Pinterest, photographer unknown.

Step 2. Begin Painting

Step-2---Begin-Painting---Version-6-robbieallenartist.jpg

Once the initial sketch is in place, you can start painting. When painting traditionally, I either first start by painting in the mid-tones of the skin, or the shadows. You can go either way, try both and see what works for you. For this digital painting I chose to paint the mid-tones first, and then I begin painting some of the half-tones and shadows. Create a layer beneath the initial sketch and select the colours that you think is the mid-tone for both the face and the hair of the person, and paint them in.

Step 3. Painting Skin Tones & Hair Using Layers.

Step-3---Developing-The-Skin-Tones-small-robbieallenartist.jpg

For this step, we work on gradually building up paint layers using the hard round brush set to opacity, and focus on detecting both the warm and cool colours, and the lights & darks of the skin and hair in the painting. Keep looking back and fourth between your painting and the model or your photo reference, notice the warm and cool variations in the skin. When painting the hair, focus on the large shapes first, use a large brush, and notice where the lighter clumps/strands are. You can use multiple layers to paint different areas of the painting if you are unsure. But if you are confident and want to replicate the practice and challenge of painting in traditional media, use one layer.

Step 4. Building Up Some of The Details

Step-4---Building-Up-Some-of-The-Details-8-small-robbieallenartist.jpg

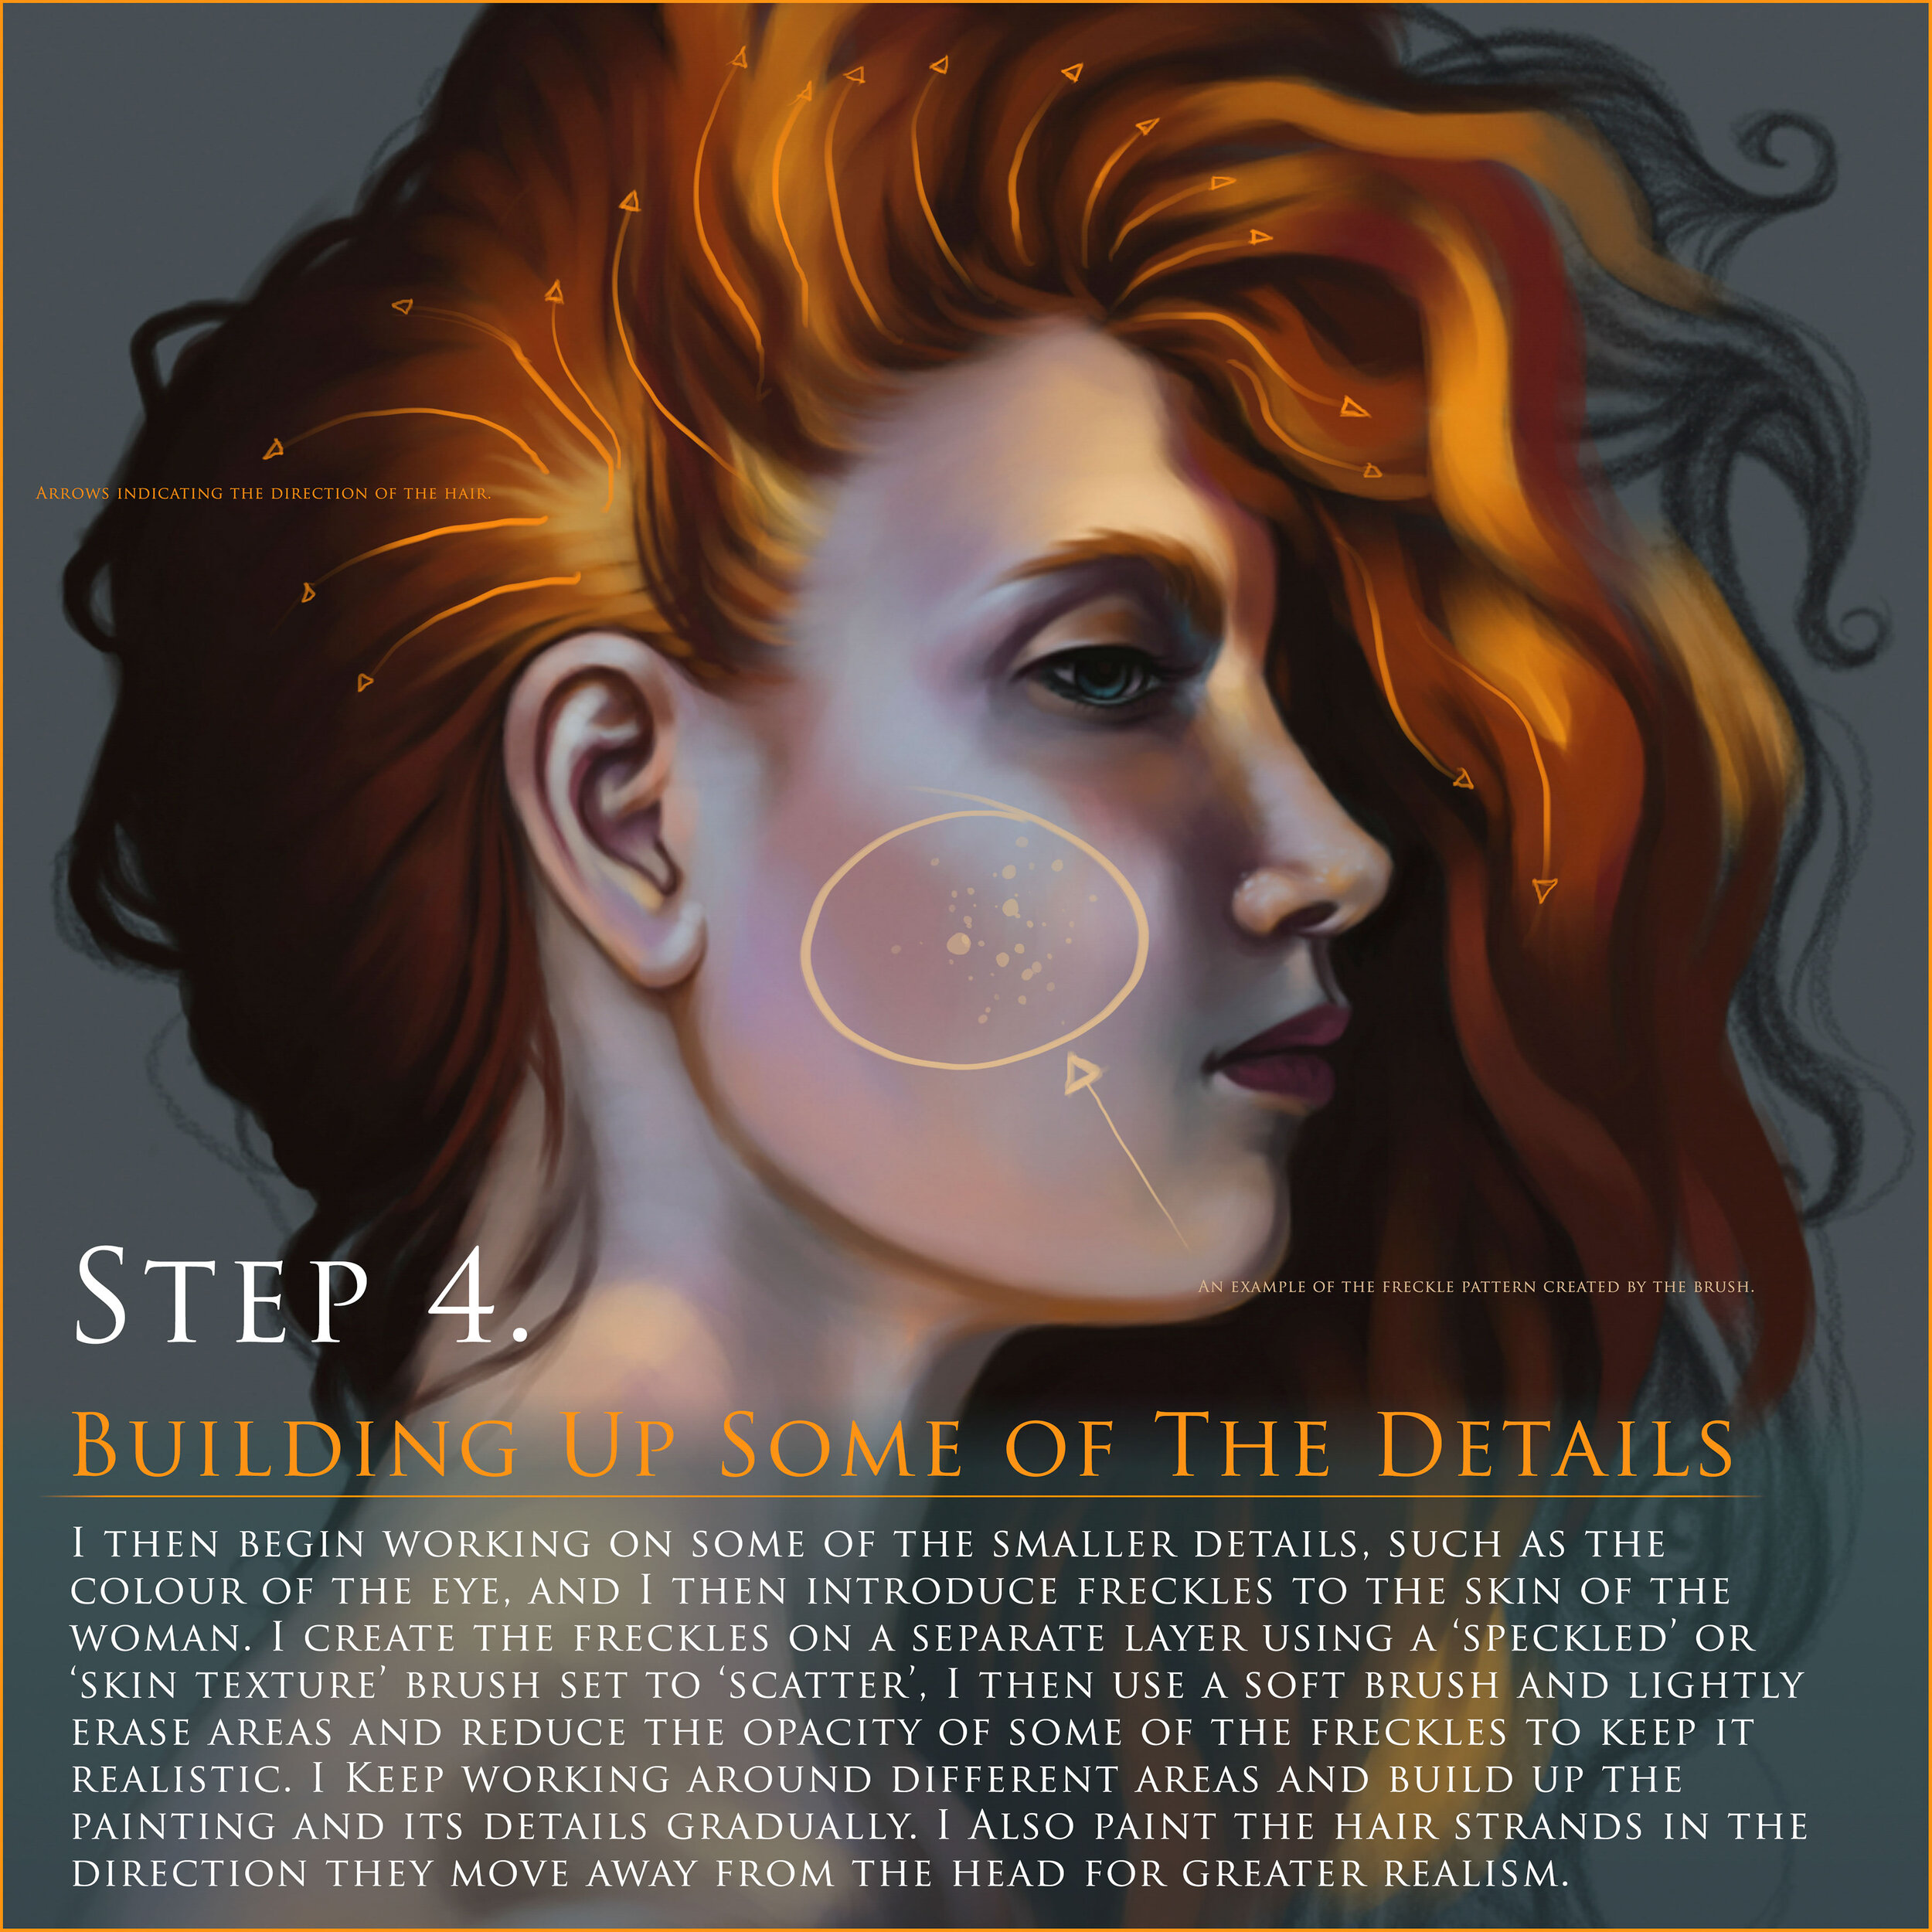
I then begin working on some of the smaller details, such as the colour of the eye, and I then introduce freckles to the skin of the woman. I create the freckles on a separate layer using a ‘speckled’ or ‘skin texture’ brush set to ‘scatter’, I then use a soft brush and lightly erase areas and reduce the opacity of some of the freckles to keep it realistic. I Keep working around different areas and build up the painting and its details gradually. I Also paint the hair strands in the direction they move away from the head for greater realism.

Step 5. Focusing on The Celtic Design of The Hair

Step-5---Focusing-on-The-Design-of-The-Hair-4-small-robbieallenartist.jpg

I keep developing the skin tones and lightly blend them in areas using a hard round brush set to opacity, leaving some soft and hard edges. I then start working on the hair strands and details around the painting. I bring in some Celtic inspired patterns into the hair design, which consist of spirals and intricate, weaving lines and shapes, making the portrait more illustrative, authentic and original. I also start to work more on the background, using a soft brush, darkening the corners to frame the portrait. The background compliments the red/orange hair, which is a feature of many of the original, native Celtic people from Ireland, Scotland, England and Wales.

Take The Time To Research And Create Mood Boards

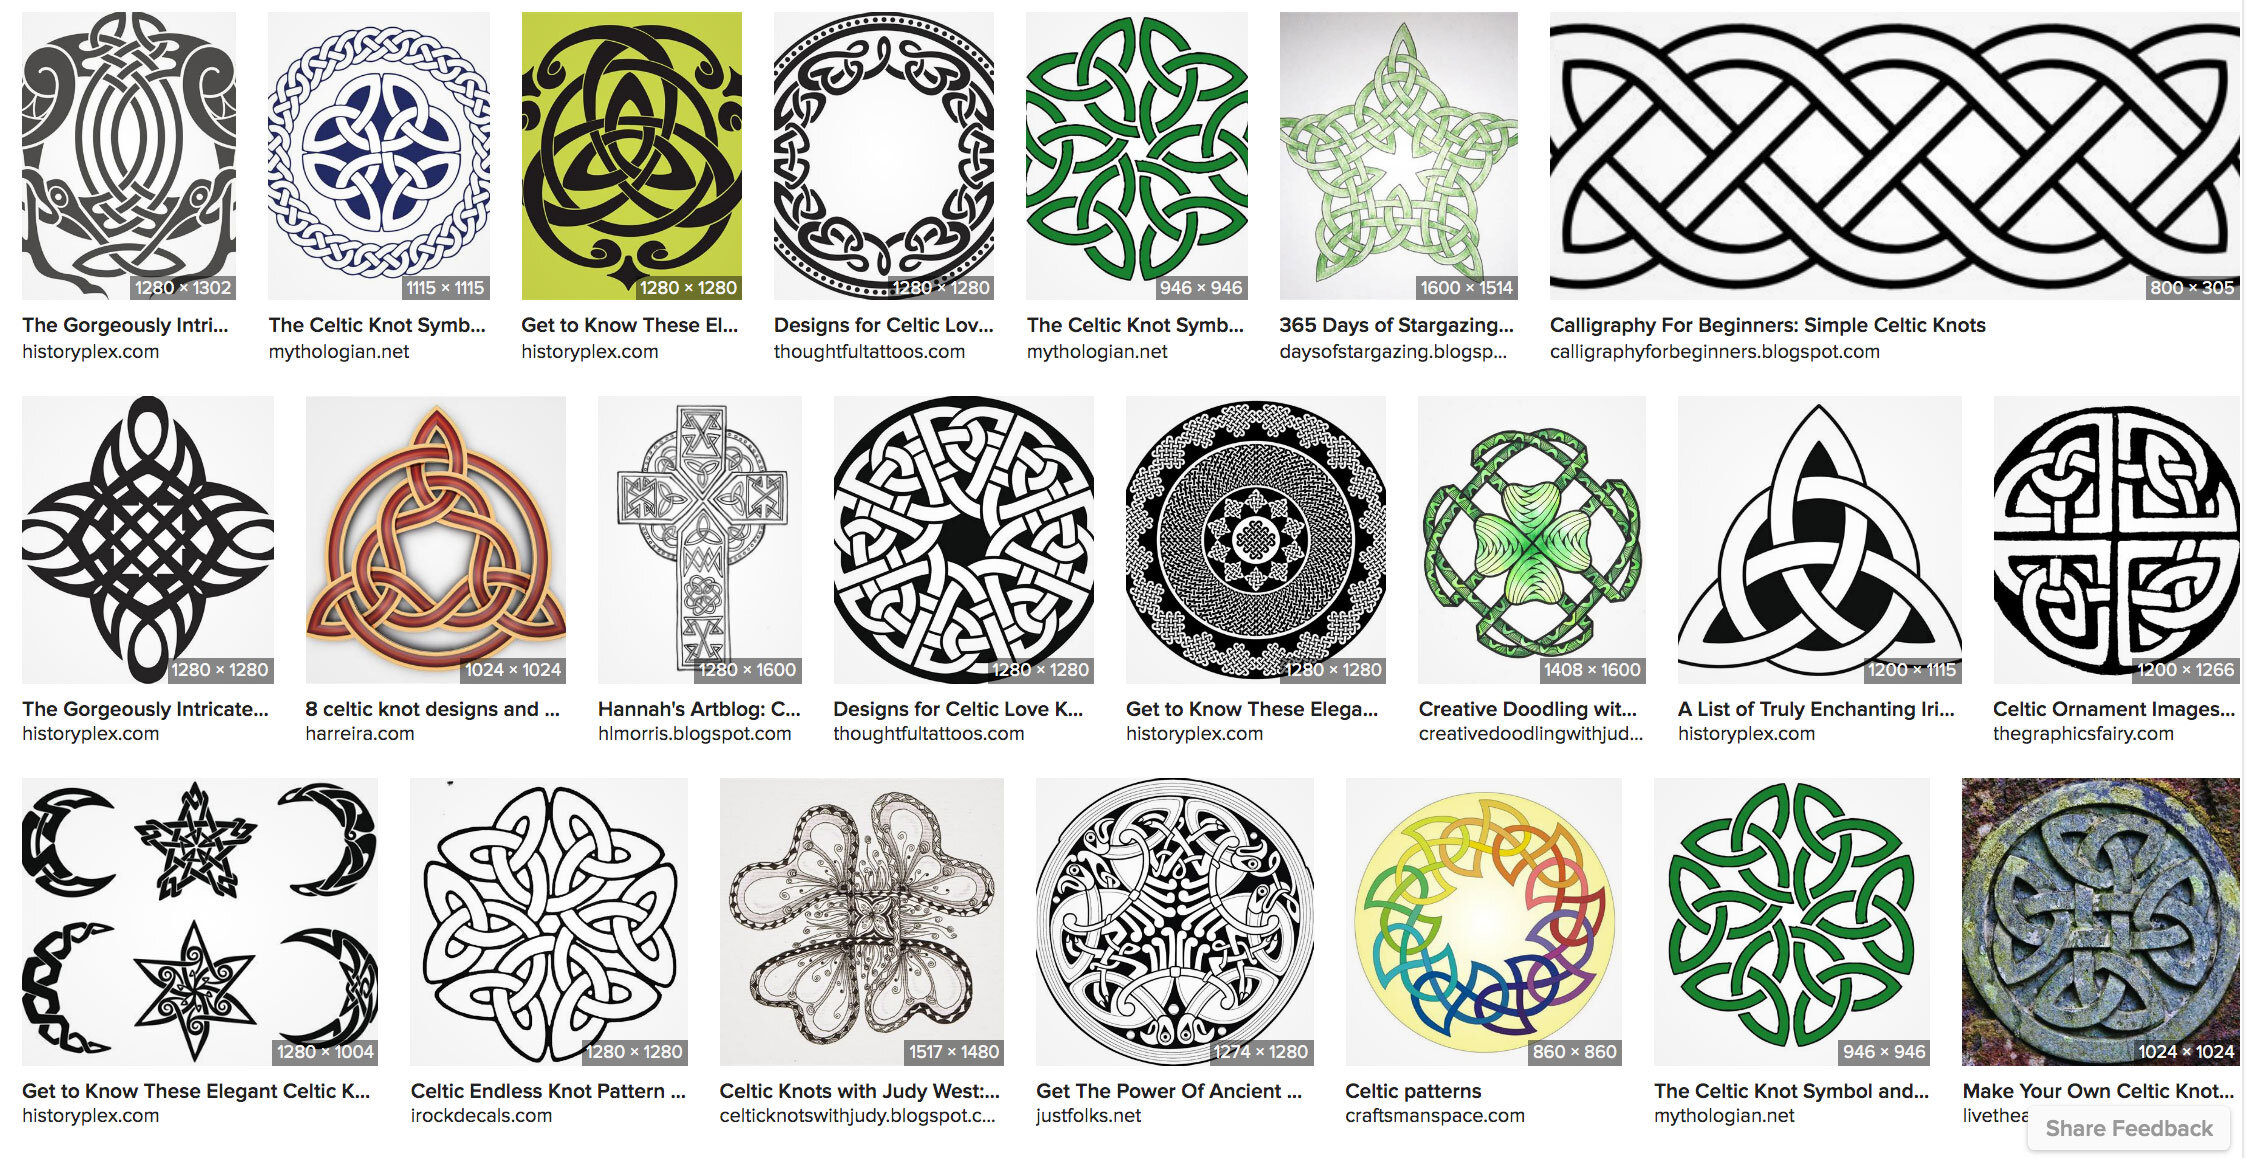
A compilation of Celtic designs I found on a search engine which served as my inspiration for the hair.

A compilation of Celtic designs I found on a search engine which served as my inspiration for the hair.

I usually put together a mood-board, or reference board of images I have collected that serve as my inspiration to generate interesting and new ideas. I think you should always use reference and image gathering in your design process, especially when designing based on different cultures around the world, where historical information and context is not widely known, and requires a little work on your behalf to investigate. The imagery will fuel your imagination for the design process.

Step 6. Detail Work & Light Reflections

Step-6---Details-&-Light-Reflections-5-small-robbieallenartist.jpg

I keep working on details in the skin and hair. I also paint reflections on the shoulder and neck of the woman on a separate layer, using a soft, round brush set to opacity. In the reference photo, the model had some kind of water or glass reflection on her neck and shoulders. Such reflections are not easy to paint, and require focus on concentration to find the right translucency or transparency, and how it interacts with the texture of the skin. Observe closely and be patent. At this stage you can really relax and enjoy the process of bringing the painting towards a finish.

Step 7. The Finishing Touches

Step-7---The-Finishing-Touches-7-small-robbieallenartist.jpg

Finally I add some faint fire embers for an extra spark of visual interest and creativity! I find painting elements like fire, flames and embers fun and enjoyable. I paint them in first using the lasso tool for a clean shape, and then add a blur filter to give the embers the appearance of being in motion.

I then zoom out, check the painting, make final corrections and add an adjustment layer, slightly increasing the brightness/contrast and vibrancy, and then call it finished.

The Finished Painting

The-Finished-Painting-small-robbieallenartist.jpg

The Full Size Painting

Read-Head-Sketch-41-Final-Orange-Border-small.jpg

Thank you for reading my digital painting tutorial, I hope you found some value in it, if you did, please like, share and leave a comment below.

- Robbie

Subscribe To My Free Art Blog

Sign up with your email address to receive my latest blog posts, news and updates.

We respect your privacy.

Thank you!
In Digital Art, Advice & Tips, Tutorial Tags how to paint, how to paint a Celtic female portrait, how to paint a portrait in photoshop, how to paint a portrait in procreate, celtic portrait, celtic inspired, celtic design, digital painting, digital art
1 Comment
Why You Should Practice your craft in the morning.png

My Top 9 Digital Art Paintings of 2020 & Reflections on The Year

Robbie Allen January 1, 2021

Perception of Time

Personally for me the year flew past. I am amazed with how quickly each week passes, I can't believe 1 year has gone by already. But I have been experiencing this for a few years now, not just in 2020. I think the main reason why was because I managed to dedicate much of my time to my art, study, and overall creative productivity, which helped me to feel elevated during tough periods. In 2018/2019 I was doing a lot of travel, combined with art practice, and this definitely seemed to add to the sense of acceleration of time to my own personal experience. 2020 was a year I was able to fully dedicate myself to art and further study.

Read More
In Art Blog, Art, Advice & Tips, Drawing Tags digital painting, digital art, digital art tips, discipline, blog, art blog uk, art blog england, uk art blog, british artist, fantasy art, fantasy art uk, illustration, top 9, my top 9, top 9 2020, 2020 reflections
Comment
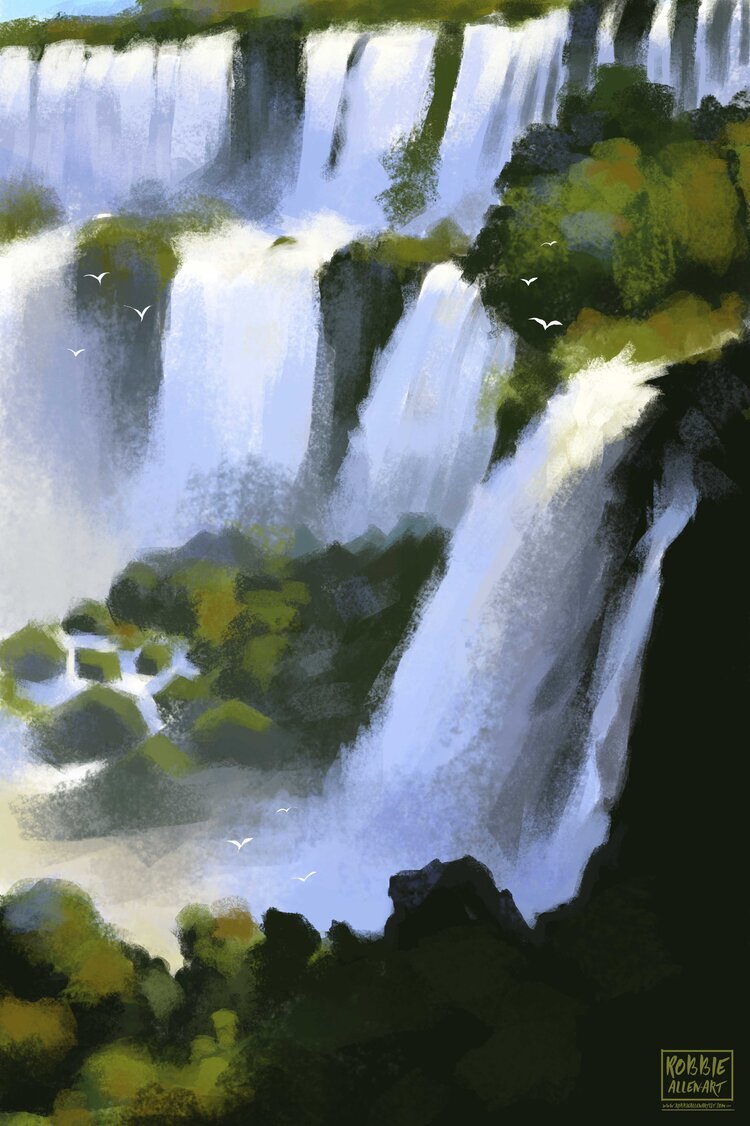
This is my personal favourite digital painting I did from one of the photos in my reference pack.

This is my personal favourite digital painting I did from one of the photos in my reference pack.

Iguazu Falls - Photo Reference Pack For Creators - Brazil & Argentina

Robbie Allen June 15, 2020

This reference pack is for all creative types, artists, photographers, 3d modellers and bloggers. Inside this reference pack you will have access to all of my unedited high definition photos of the stunning natural environment and wildlife I came across, from the perspective of two different countries, Brazil and Argentina!

Read More
In Reference Pack Tags iguazu falls, iguaçu falls, south america, photography, south america photography, iguazu photo pack, iguazu photo reference pack, digitalart, digital painting, iguazu blog
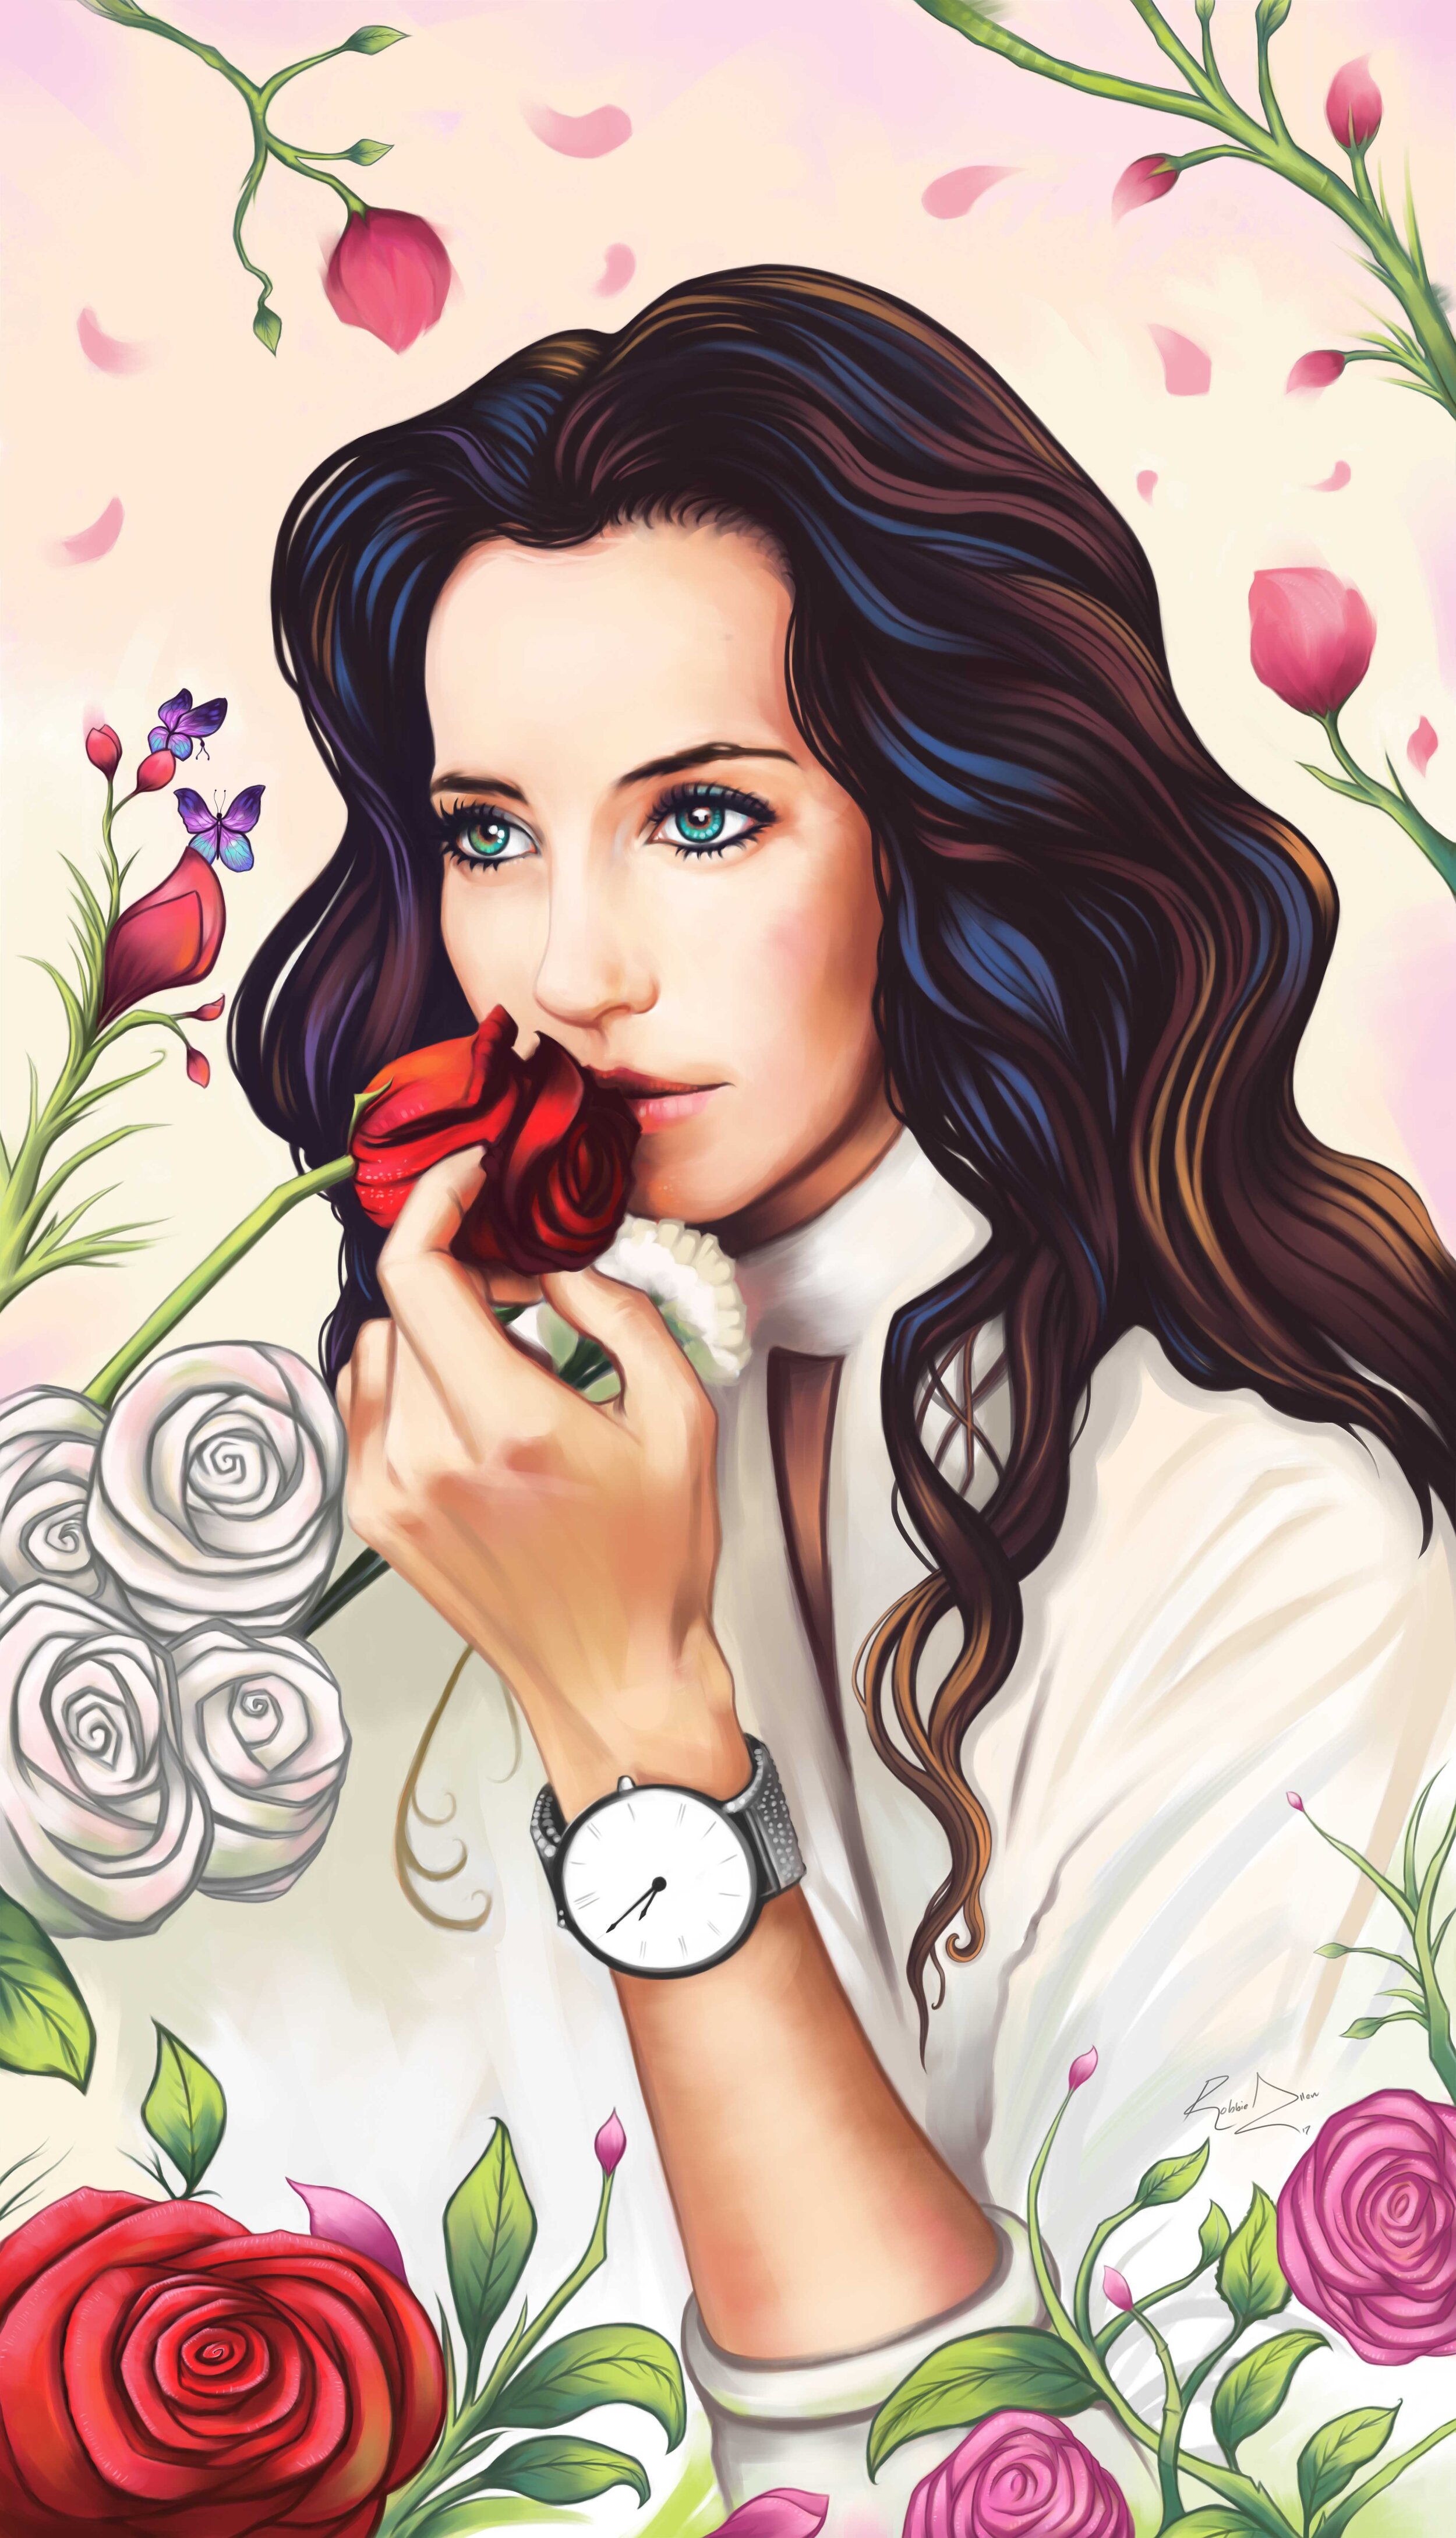
How-I-Painted-The-Digital-Portrait-of-Christelle-robbieallenartist-2.jpg

How I Painted The Digital Portrait of Christelle

Robbie Allen February 27, 2020
Christelle-Portrait-Crop-2-robbieallenartist.jpg

A couple of years ago I completed what I considered to be my best digital portrait illustration to date. I finished a realistic portrait of Christelle, an ex co-worker of mine when I was living and working on The Gold Coast, Australia. 

Christelle is from France, and at the time that I worked with her, she was interested in areas such as spirituality, mindfulness, present-moment-awareness, the natural world, health & fitness, and areas such as yoga and meditation.

At one point I decided I wanted to paint Christelle’s portrait, but I wanted to add something to the piece and make it more illustrative, instead of just painting directly from a photo.

Going Digital

My portrait of Christelle is a digital portrait. Now for those of you who don't know, the same knowledge and method of drawing and painting is mostly applied and transferable over into digital drawing and painting. If you are unable to draw using a simple pencil on paper, digital tools will not come to your rescue, and it will not miraculously make your work better. You can learn to draw with digital software, but you can’t expect to suddenly just start creating quality art if you do not already have pre-existing knowledge of the fundamentals and practice under your belt.

There are however many benefits to working digitally. Digital is more forgiving with mistakes, you can for example escape/undo a wrong brushstroke and ‘go back in time’ when you’ve made a mistake. You can save and paint multiple versions of your artwork at different stages, try multiple different colour studies before taking one to final, and you don’t have to clean up paint at the end of each session.

Establishing Direction

Before starting a portrait or illustration, I take a few minutes to sit quietly and think about what it is I want to achieve, capture and create. This simple bit of planning early on is essential to help establish a clear direction for your artwork to go in, and should you get lost, you can always refer back to it and check where you are at in the process. So before painting, I grab a sheet of paper and a pen, and write down questions, and begin to think where I want to take my painting.

Digital Tools And The Step-By-Step Process

I mostly paint with Adobe Photoshop throughout the painting process, but sometimes I like to use Corel Painter, especially for blending techniques in the final stages of a painting.

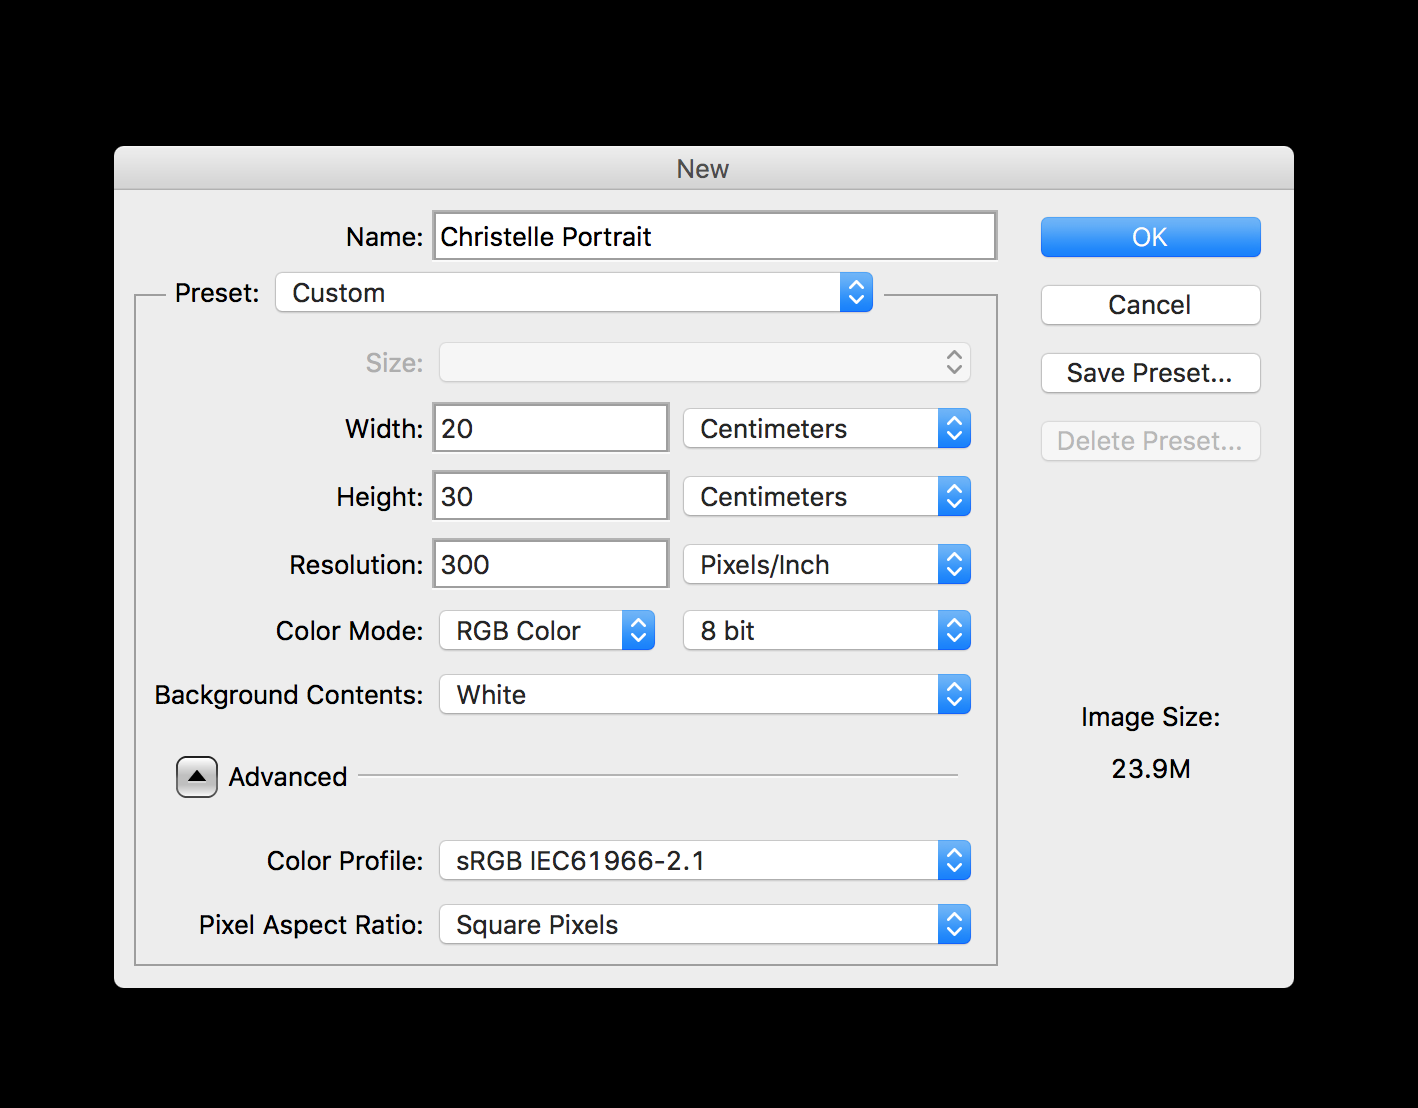
When starting a digital painting, I open up Photoshop and create a new canvas. I like to start painting on a file that is not too big at first, and gradually increase the size over time as the painting develops. This prevents your computer from lagging and slowing down when making large brushstrokes on a high-resolution image, and allows for a smoother, more enjoyable workflow.

In Photoshop, go to the top bar and select ‘File’, then ‘New’ for a new document/canvas to work with.

In Photoshop, go to the top bar and select ‘File’, then ‘New’ for a new document/canvas to work with.

Naming the new document/canvas, and setting up its size.

Naming the new document/canvas, and setting up its size.

Open up the brushes panel by selecting ‘Window - Brush’ in the Photoshop tab bar on the top of the page. Then select your brush in the brushes menu.

Open up the brushes panel by selecting ‘Window - Brush’ in the Photoshop tab bar on the top of the page. Then select your brush in the brushes menu.

Once I’ve opened up the canvas, I sometimes like to fill the background with a colour to work on top of, to do this you double click the background layer in the layers menu, and then select the paint bucket tool, choose your colour and drop it down onto the canvas. From there I create a new layer which sits on top of the background, I select a hard round brush from the brushes menu, select a grey tone that resembles a pencil stroke, and begin roughly sketching in the shapes and proportions that make up the subject.

I then begin to start painting with colour, and I immerse myself into the painting process. I will show you some of the stages below.

Christelle work-in-progress 1.

Christelle work-in-progress 1.

In this early sketching stage I aimed at getting the main shapes, composition and likeness down early. I also introduce additional design elements into my composition.

Christelle work-in-progress 2. The first colour pass.

Christelle work-in-progress 2. The first colour pass.

The second phase of my portrait, the first colour pass. In this stage I aimed at getting the main colours down. I aim for a stronger sense of vibrancy in the colours/hue as compared to the original photo I worked on, where the colours seemed too de-saturated and faded.

Christelle work-in-progress 3. Developing colour and focusing on the imaginary elements.

Christelle work-in-progress 3. Developing colour and focusing on the imaginary elements.

At this stage I was getting closer to the finished painting. Having got much of the main colours and proportions complete for Christelle, I chose to focus on detailing some of the imaginary elements, decorating the painting and leading the eye through composition.

The idea behind this was appreciation for nature and present-moment awareness. At a time which is fast looking like something out of a dystopian future novel much like George Orwell’s 1984, we are becoming more and more locked into technology and forgetting to appreciate the amazing world around us. Just walk down the street and observe people on their way to/from work. If in the city center, I bet most are glued to their phones and not paying attention to the world around them in the slightest.

Wip 4 - The playful creative element. Working on details and the two butterflies as the focal point of Christelle’s gaze.

Wip 4 - The playful creative element. Working on details and the two butterflies as the focal point of Christelle’s gaze.

Getting much closer to finishing, I started working on detailing the focal point of the painting, which Is Christelle's eyes leading to the two butterflies. Again how often do we pay attention to the insects, the birds, the colours, sites, sounds and life around us? What can we benefit form it if we do? Can such a simple practice actually enhance our creativity and productivity in a fast-paced world?

How about we re-introduce a little more gratitude, awe, respect and appreciation for the little things around us. Even if it is just another grey, rainy, cold day in England.

The Finished Digital Painting - Full Size

The Finished Digital Painting - Full Size

So that’s it for this post, I hope you found some value in it.

I do have a digital portrait and traditional portrait painting service on my website for both colour and b&w paintings: https://www.robbieallenartist.com/realisticportraits

This makes a great gift for a loved one, a family member, or even for yourself. I can also paint and draw animals and pets on request. Please do share this to anyone you think might want to have a portrait done as a gift.

Thank you for reading, sharing and commenting. It all makes a difference and inspires me to keep making posts. If you have any questions, just ask.

Thank you,

Robbie

Subscribe

Sign up with your email address to receive new blog posts, news and updates.

We respect your privacy.

Thank you!
In Art Blog, Digital Art, Art Tags portrait, portrait painting, digitalart, digital painting, illustration
Comment
Digital-portrait-painting-process-of-Seilah - robbieallenart.jpg

Digital Portrait Painting Process of Séilah - Brighton, U.K

Robbie Allen January 14, 2020
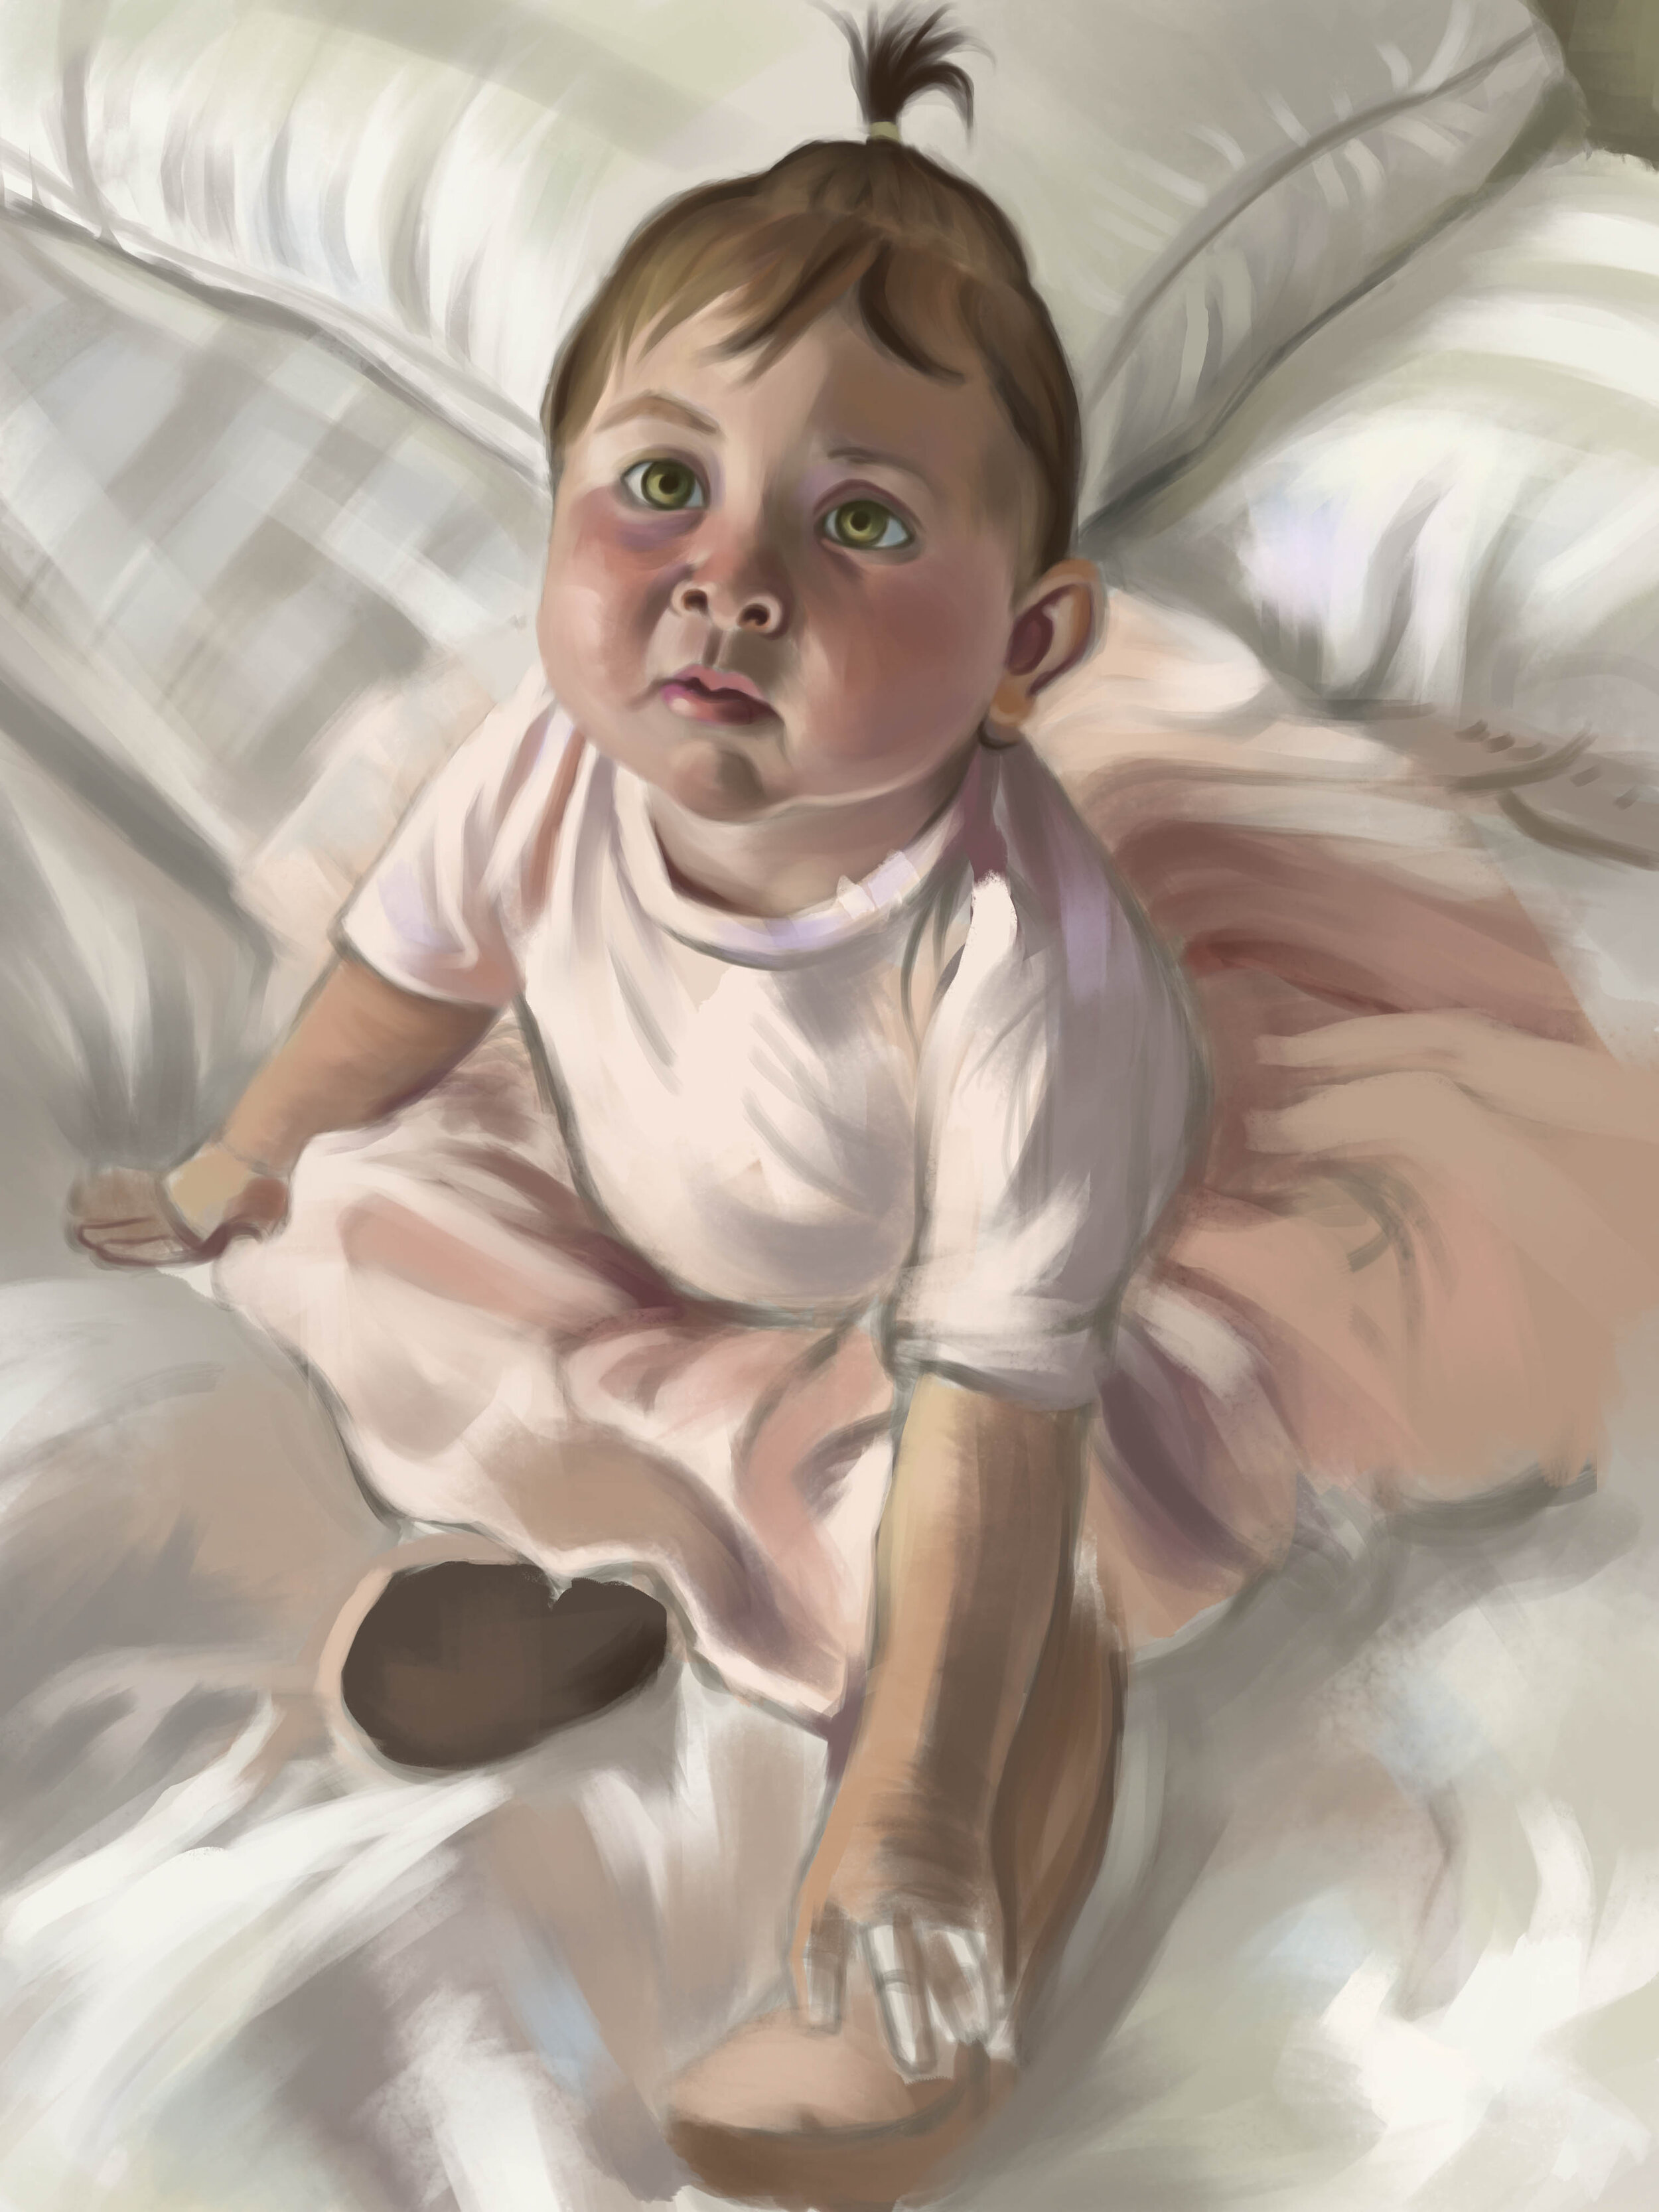
This is my finished portrait painting commission of Séilah.

This is my finished portrait painting commission of Séilah.

Introduction

Hello everyone,

Firstly I would just like to say that I am both a traditional fine artist, and a digital artist. I paint in both mediums. But for this particular painting, the entire process was completed digitally. For more of my traditional work, head over to my painting pages on my website:

For my watercolour & gouache paintings; https://www.robbieallenartist.com/watercolour-gouache

For my oil paintings; https://www.robbieallenartist.com/oil-paintings

Some of which are available for sale on my website shop; https://www.robbieallenartist.com/plein-air-paintings

The painting process video link is provided at the bottom of this post, scroll down if you would prefer to watch that first. 


Deciding Artistic Direction

In 2019 I was asked to paint my sister’s friend’s daughter as a gift for a family members Birthday present. Skye, who commissioned me for the portrait, chose for me to have the portrait painted digitally instead of traditionally.

I organised to meet up with Skye and her daughter Séilah, so that I could get a sense of her personality and character, and to take reference photos for the portrait. In the end we chose to use an already existing professional photo of Séilah, (the photographers name I’m not aware of), to use to paint my portrait of her. Meeting Séilah in person helped me to make decisions regarding what I wanted to do, and where I wanted to go with the portrait.

I chose to try and emphasise her natural curiosity for all things, her colourful and vibrant personality, and her innocence. She wasn’t even 1 year old at the time of me meeting her.

Step 1 - The initial sketch.

Step 1 - The initial sketch.

My Step-by-step Process For A Digital Portrait Painting

I started off by simply sketching Séilah and the surrounding material on a digital canvas using Adobe Photoshop with a hard round brush. I checked back on a number of occasions to check the proportions, and positioning of the drawing was accurate and true to the original photo reference. Once I had established the initial sketch, I then went on to painting the block-in, with big, broad, brush strokes, filling in areas of local colour and the mid-tones of the skin.

Step 2 - The colour block in.

Step 2 - The colour block in.

Moving Around The Canvas

Throughout the process I would move around the digital canvas, developing different areas of the painting, raising them up all together, gradually in more and more detail as I progressed. You can see this in action by watching my video below. This is generally considered to be a solid practice by many professional artists who I have studied from. Personally I find that it helps to keep the painting harmonious, I can paint more instances of ‘lost & found’, and I can mix in foreground and background colours in a way on the canvas that helps to create a better sense of realism. This exercise also serves to keep your mind and eye fresher for longer as your attention isn’t focused on just one area for any given length of time.

Useful Digital Techniques

I paint with a MacBook Pro and I hit the keys (command -, and command +) constantly to go closer and further away from the digital canvas. This digital technique ultimately emulates the real life process of constantly standing backwards and forwards from the physical canvas in order to see the bigger picture of the painting, keeping in control of the piece and being able to detect mistakes and better place new brush strokes with confidence. All of which leads to a more fluid painting process and less accident or error prone one.

This process I also find to be fun, creating a sense of enjoyment. If you get stuck on one area, why not move to another momentarily and come back to where you were before? You might just find that you can suddenly solve the problem with fresh eyes within a matter of minutes of not looking at it.

I also get into the habit of rotating the canvas using the ‘rotate’ tool on Adobe Photoshop, which I have set up as a hotkey under ‘r’. This again emulates the traditional art process of rotating the paper or pad on a surface on order to make cleaner and more accurate lines and brush strokes. This isn’t really possible when standing at an easel, however, making this an exclusive benefit of digital painting over traditional.

Below are more of the digital painting steps as the painting gradually progresses.

Step 3 - Painting in more of the details.

Step 3 - Painting in more of the details.

Step 4 - Further refinement.

Step 4 - Further refinement.

Step 5.

Step 5.

Step 6.

Step 6.

Step 7.

Step 7.

Step 8.

Step 8.

Getting closer to working on the final details in this step.

The finished painting.

The finished painting.

Applying The Final Details

And for the final image I refined the details further focusing in on her facial expression and adding some bounce colour in the surrounding material and drapery. I use a small brush size for the final steps, so I can get into the important areas around the focal point (the face and features) and also to clean up lines and edges where I see I think it is necessary.

I write my signature, save the files, back them up and call the painting finished.

Check out my youtube video above for more insight into the background and process of this digital painting of Séilah.

Thank you all very much for reading, watching, liking and sharing.

If you would like to know about my future posts, join my mailing list below.

Subscribe

Sign up for free with your email address to receive my latest blog posts, news, updates, promotions and traditional and digital art tips.

We respect your privacy.

Thank you!

© 2020 Robbie Allen Artist. All images and content (c) copyright Robbie Allen

In Art Blog, Art Videos, Advice & Tips Tags painting, digitalart, digital painting, realism, realistic painting, portrait painting, portrait, brighton, brighton artist
Comment
Above image; Video Intro Title Image

Above image; Video Intro Title Image

Greg Chalmers Digital Portrait - Work In Progress

Robbie Allen January 29, 2018

This is my first screen recording that I have made of me painting digitally in Adobe Photoshop. It is sped up 40X so you can quickly see how I go about my digital portraits, and the painting process. I used just one brush, and only colour picked from my own colour selection and combinations on the painting itself, similar to how I would pick up paint from a real colour palette.

Read More
In Art, Art Videos Tags art, artist, digital art, digital painting, portrait, portrait painting, work in progress, realism
Comment

Search Posts

Post Archive
  • Art Blog
  • Art
  • Advice & Tips
  • Reference Pack
  • Travel Journal
  • Digital Art
  • Art Videos
  • Painting
  • Drawing
  • Ink Drawing
  • Illustration
  • Pencil Drawing
  • Photo Reference Pack
  • Tutorial
 

Featured Posts

Featured
The Value of Painting Unfinished Studies
Jul 18, 2022
The Value of Painting Unfinished Studies
Jul 18, 2022
Jul 18, 2022
Cornwall - The British Coast - Photo Reference Pack
Jul 8, 2022
Cornwall - The British Coast - Photo Reference Pack
Jul 8, 2022

Who knew that ENGLAND and the British Isles was one of THE most stunning places on Earth?

This is my Cornwall The British Coast Reference Pack for creators, matte painters, artists, photographers, 3d modellers, bloggers, all content creators.

Including 8.5 GB of high resolution photos and videos.

Jul 8, 2022
How-To-Paint-A-Celtic-Female-Portrait-In-Photoshop-&-Procreate-11-robbieallenartist.jpg
Apr 17, 2021
How To Paint a Celtic Female Portrait - In Photoshop & Procreate
Apr 17, 2021
Apr 17, 2021
How To Paint Candles In Natural Light (In Photoshop & Procreate)
Mar 4, 2021
How To Paint Candles In Natural Light (In Photoshop & Procreate)
Mar 4, 2021

There’s something quite magical about learning how to paint certain textures and elements, especially fire or the glow of a naked flame, and how it interacts with surrounding objects.

In this tutorial I break down in a few simple steps, how to paint candles in natural lighting digitally using Photoshop or Procreate.

Mar 4, 2021
My Top 9 Digital Art Paintings of 2020 & Reflections on The Year
Jan 1, 2021
My Top 9 Digital Art Paintings of 2020 & Reflections on The Year
Jan 1, 2021

Perception of Time

Personally for me the year flew past. I am amazed with how quickly each week passes, I can't believe 1 year has gone by already. But I have been experiencing this for a few years now, not just in 2020. I think the main reason why was because I managed to dedicate much of my time to my art, study, and overall creative productivity, which helped me to feel elevated during tough periods. In 2018/2019 I was doing a lot of travel, combined with art practice, and this definitely seemed to add to the sense of acceleration of time to my own personal experience. 2020 was a year I was able to fully dedicate myself to art and further study.

Jan 1, 2021
Painting A Portrait of A Wolf
Dec 17, 2020
Painting A Portrait of A Wolf
Dec 17, 2020

Painting a portrait of one of my favourite animals, the wolf! In this tutorial I will show you the step-by-step process and my thought process of how to paint a realistic digital portrait of a wolf using Adobe Photoshop.

Dec 17, 2020
Machu Picchu - Photo Reference Pack
Nov 28, 2020
Machu Picchu - Photo Reference Pack
Nov 28, 2020

Introducing Machu Picchu Photo Reference Pack.

Inside you will find a total of 124 photos from two different camers, and 14 short video clips from within Machu Picchu itself.

I visited Machu Picchu early 2019, and it was one of the highlights of my South America trip.

You can use these photos videos however you want for your creative projects, personal or commercial.

I hope you enjoy them!

Nov 28, 2020
How-To-Paint-The-Figure-Alla-Prima---Dark-Grey-robbieallenartist.jpg
Nov 21, 2020
How To Paint The Figure Alla Prima
Nov 21, 2020
Nov 21, 2020
Porto,-Portugal-Reference-Pack-small-23.jpg
Nov 20, 2020
Porto, Portugal - Photo Reference Pack For Artists & Creators
Nov 20, 2020
Nov 20, 2020
Decorative Art Photo Reference Pack For Artists & Creators - Casa Museu Guerra Junquiero - Baroque Style - Portugal
Nov 13, 2020
Decorative Art Photo Reference Pack For Artists & Creators - Casa Museu Guerra Junquiero - Baroque Style - Portugal
Nov 13, 2020
Nov 13, 2020

Powered by Squarespace

Donate
Become a Patron!