This is my latest digital painting tutorial where I break down the steps for my latest portrait painting. The same process can be applied in both Adobe Photoshop and Procreate. I hope you enjoy the post and find some value in it!
Step 1. The Initial Sketch

Start off by setting up the canvas to match the dimensions of the original photo reference, or to your own Liking, You can then ‘tone’ the canvas with a warm or cool colour for the background and fill using the paint bucket tool. This removes the glare of the white canvas and encourages you to get started. Then sketch the outline of the woman's head, facial features and hair on a separate layer. You can use a pencil brush, which closely resembles a 2b traditional pencil to give a more traditional feel, or a simple hard round brush. Take your time to get the proportions right, and enjoy the process!

The original photo reference I used for the portrait. Source: Pinterest, photographer unknown.
Step 2. Begin Painting

Once the initial sketch is in place, you can start painting. When painting traditionally, I either first start by painting in the mid-tones of the skin, or the shadows. You can go either way, try both and see what works for you. For this digital painting I chose to paint the mid-tones first, and then I begin painting some of the half-tones and shadows. Create a layer beneath the initial sketch and select the colours that you think is the mid-tone for both the face and the hair of the person, and paint them in.
Step 3. Painting Skin Tones & Hair Using Layers.

For this step, we work on gradually building up paint layers using the hard round brush set to opacity, and focus on detecting both the warm and cool colours, and the lights & darks of the skin and hair in the painting. Keep looking back and fourth between your painting and the model or your photo reference, notice the warm and cool variations in the skin. When painting the hair, focus on the large shapes first, use a large brush, and notice where the lighter clumps/strands are. You can use multiple layers to paint different areas of the painting if you are unsure. But if you are confident and want to replicate the practice and challenge of painting in traditional media, use one layer.
Step 4. Building Up Some of The Details
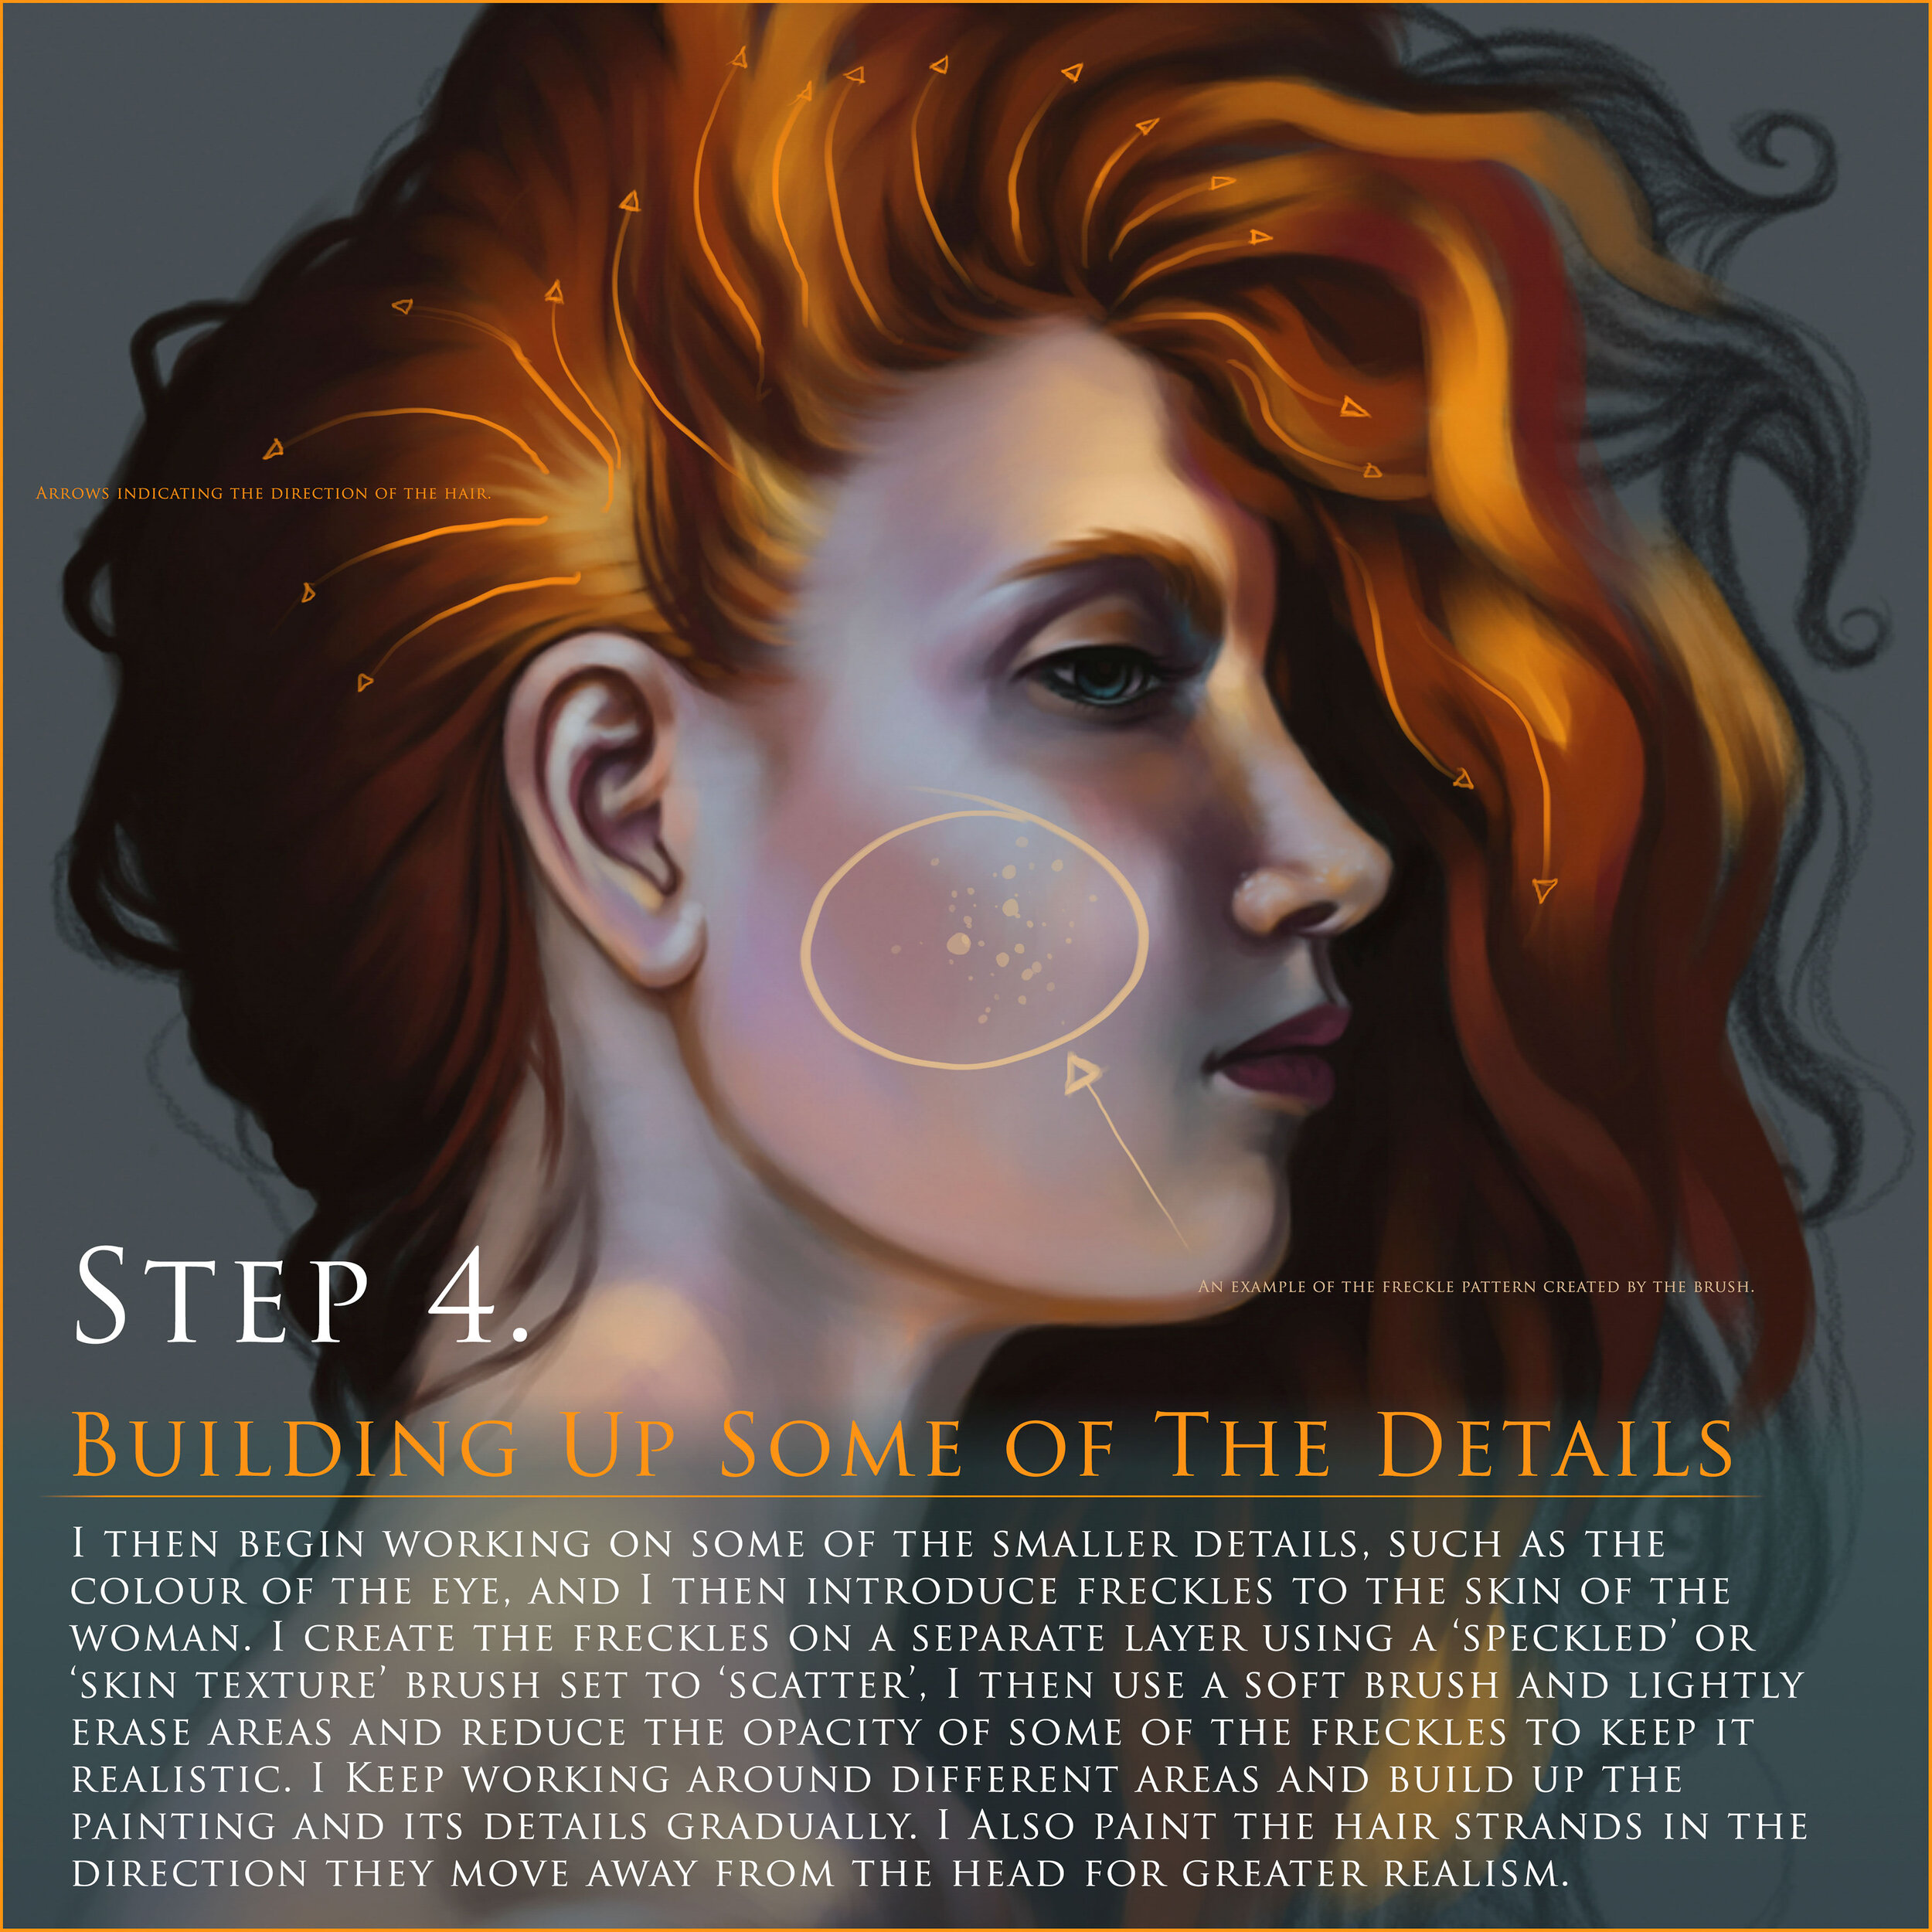
I then begin working on some of the smaller details, such as the colour of the eye, and I then introduce freckles to the skin of the woman. I create the freckles on a separate layer using a ‘speckled’ or ‘skin texture’ brush set to ‘scatter’, I then use a soft brush and lightly erase areas and reduce the opacity of some of the freckles to keep it realistic. I Keep working around different areas and build up the painting and its details gradually. I Also paint the hair strands in the direction they move away from the head for greater realism.
Step 5. Focusing on The Celtic Design of The Hair

I keep developing the skin tones and lightly blend them in areas using a hard round brush set to opacity, leaving some soft and hard edges. I then start working on the hair strands and details around the painting. I bring in some Celtic inspired patterns into the hair design, which consist of spirals and intricate, weaving lines and shapes, making the portrait more illustrative, authentic and original. I also start to work more on the background, using a soft brush, darkening the corners to frame the portrait. The background compliments the red/orange hair, which is a feature of many of the original, native Celtic people from Ireland, Scotland, England and Wales.
Take The Time To Research And Create Mood Boards
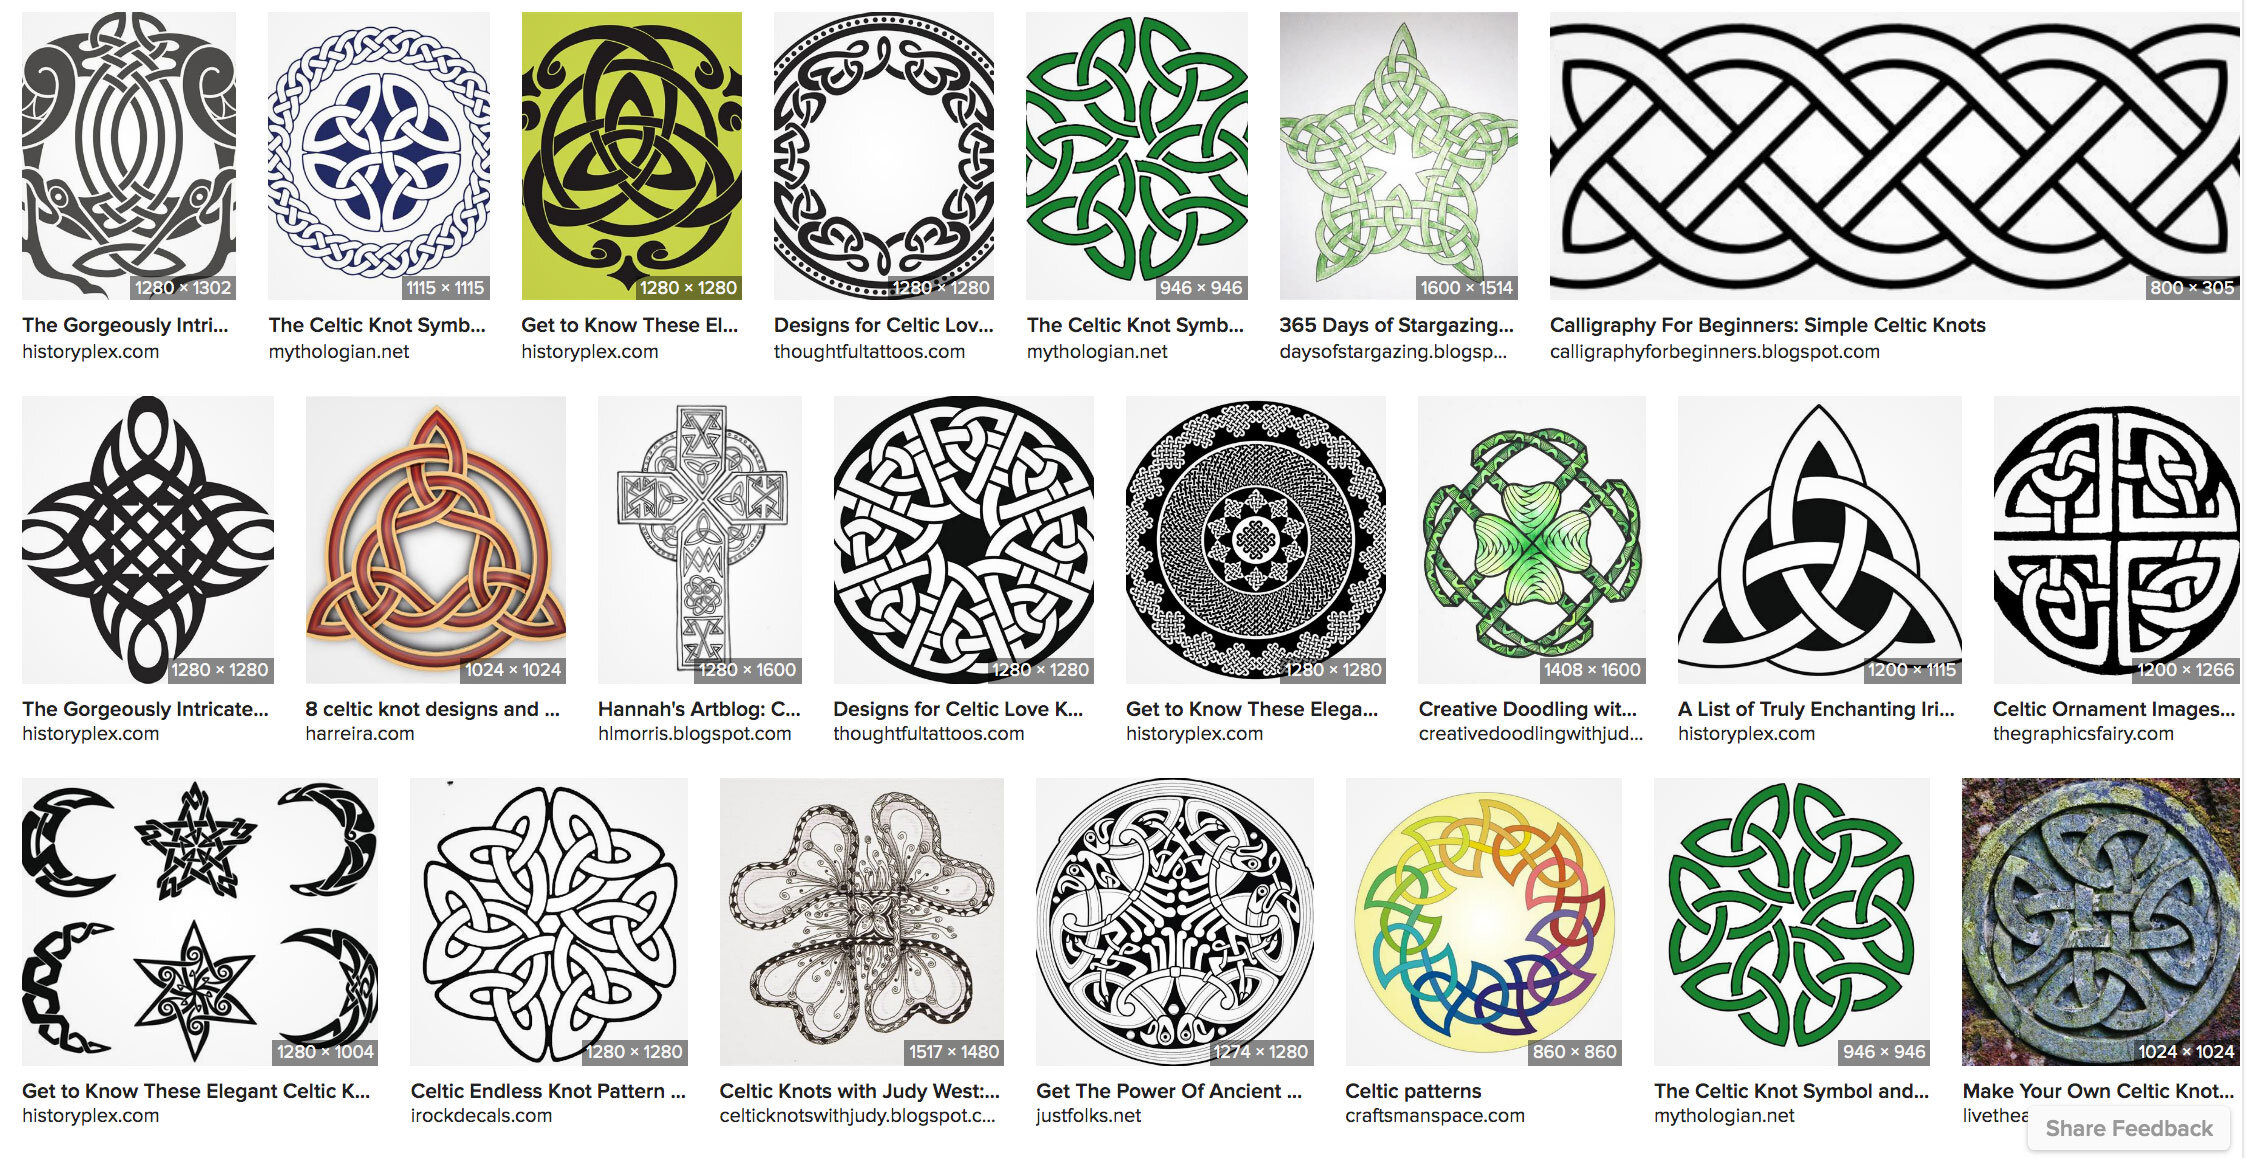
A compilation of Celtic designs I found on a search engine which served as my inspiration for the hair.
I usually put together a mood-board, or reference board of images I have collected that serve as my inspiration to generate interesting and new ideas. I think you should always use reference and image gathering in your design process, especially when designing based on different cultures around the world, where historical information and context is not widely known, and requires a little work on your behalf to investigate. The imagery will fuel your imagination for the design process.
Step 6. Detail Work & Light Reflections

I keep working on details in the skin and hair. I also paint reflections on the shoulder and neck of the woman on a separate layer, using a soft, round brush set to opacity. In the reference photo, the model had some kind of water or glass reflection on her neck and shoulders. Such reflections are not easy to paint, and require focus on concentration to find the right translucency or transparency, and how it interacts with the texture of the skin. Observe closely and be patent. At this stage you can really relax and enjoy the process of bringing the painting towards a finish.
Step 7. The Finishing Touches

Finally I add some faint fire embers for an extra spark of visual interest and creativity! I find painting elements like fire, flames and embers fun and enjoyable. I paint them in first using the lasso tool for a clean shape, and then add a blur filter to give the embers the appearance of being in motion.
I then zoom out, check the painting, make final corrections and add an adjustment layer, slightly increasing the brightness/contrast and vibrancy, and then call it finished.
The Finished Painting

The Full Size Painting

Thank you for reading my digital painting tutorial, I hope you found some value in it, if you did, please like, share and leave a comment below.